In the first part of this series, we looked at the two main types of moving average – namely simple moving average (SMA) and exponential moving average (EMA), discussing the relative merits of each. Today, we’re going to look at two ways in which you can use moving averages in your trading.
Using Moving Averages to Determine Trend
One of the primary uses for moving averages is to determine the trend. As a rule of thumb, if the price action tends to stay above a single moving average, this is a sign that the price is on a general uptrend. Similarly, if the price action tends to stay below a single moving average, then that means that the price is on a downtrend.
While this is certainly a tidy explanation, it is a bit of an over-simplification. For example, if EUR/USD has been in a downtrend, and there a news release comes out that forces it higher, does this mean that there is a change in trend?
In many cases, the answer to this question will be ‘no’, and if you place a trade based on what you perceived to be a change in direction, then you will have a higher-than-average chance of getting caught out by a fakeout and losing money. Often, traders will react to news in a short term way, with the price apparently changing direction before a correction and the trend resuming.
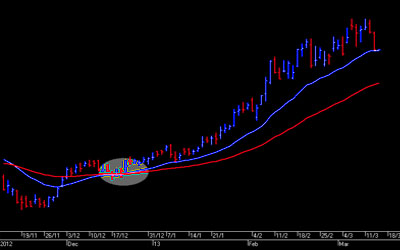
One way to avoid this is to plot more than one moving average on your charts, as this will give a clearer indication of whether the pair is trending up or down. In an uptrend, a faster-reacting moving average should be above the slower one, and the reverse is true in a downtrend. In the chart below, we have a 10-period SMA and a 20-period SMA to demonstrate this point:
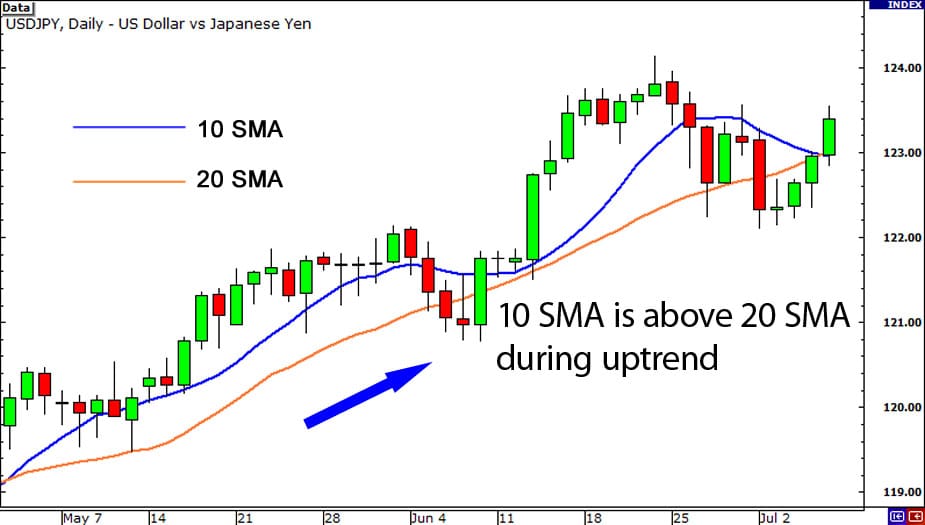
As we can see, the 10 SMA is above the 20 SMA throughout the uptrend. Therefore, we can use moving averages to illuminate whether a pair is trending or not, and in what direction, and this can be combined with your knowledge of trend lines to decide whether to go long or go short on a trade. The same principle applies if you use more than two moving averages, because as long as they are in order (fastest to slowest in an uptrend, slowest to fastest in an downtrend), then you can take that to be a clear indication of a trend in progress.
Trading Moving Average Crossovers
While trading reversals can be a pretty risky strategy, as this greatly increases your chances of getting faked out, it is nonetheless useful to be able to detect when a trend might be coming to an end.
One way to detect if a trend is likely to end soon is to overlay a couple of moving averages of different period lengths, and wait for them to cross over. When moving averages cross over one another, it could mean that the trend is about to change soon. And if you are careful, it is possible to profit from trading reversals.
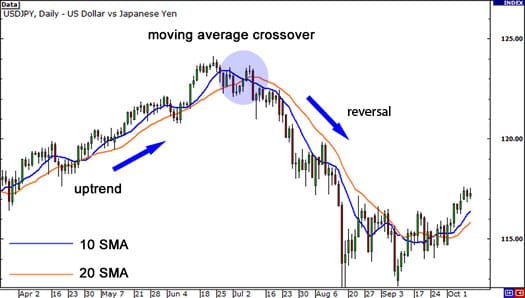
As we can see in the above chart, the pair was trending up between April and July, and then in the middle of July, the 10 SMA crossed below the 20 SMA. After that, the pair entered into a downtrend. If you had shorted the pair at the point of the crossover, you would have made nearly a thousand pips.
However, as we have established, this could be a risky strategy, as crossovers can be caused by short-term blips. A less risky way to approach this type of trade is to close out an open position when the moving averages cross over, and then enter a new trade once the price has moved a certain number of pips in the opposite direction – thereby confirming the reversal.
It’s important to note that trading crossovers only really works when the market is trending and/or volatile, as crossover signals are commonplace when a market is ranging, and you could end up getting caught out.
In the third and final part of our series, we’re going to look at how moving averages can be used as a form of support or resistance, and will be giving some general tips on how to avoid getting caught out when using them in your trading.
Other articles in this series:
A forex trader’s guide to moving averages: Part 1
A forex trader’s guide to moving averages: Part 3
Tradersdna is a leading digital and social media platform for traders and investors. Tradersdna offers premiere resources for trading and investing education, digital resources for personal finance, market analysis and free trading guides. More about TradersDNA Features: What Does It Take to Become an Aggressive Trader? | Everything You Need to Know About White Label Trading Software | Advantages of Automated Forex Trading