Trading villagers in Minecraft is a great way to get rare items, enchanted books, and tools without spending hours mining or exploring. If you’re tired of searching for diamonds or just want to fill your chests with emeralds, learning how to make the most out of villager trading is a must. This guide will walk you through everything you need to know about trading villagers in 2025, from choosing the right professions to building a trading hall that actually works.
Key Takeaways
- Trading villagers is one of the fastest ways to get rare items and resources in Minecraft.
- Each villager profession offers different trades, so pick the ones that match what you need most.
- Leveling up villagers by trading unlocks better deals and more useful items.
- Building a safe, organized trading hall keeps your villagers protected and makes trading easier.
- Curing zombie villagers and using workstations smartly can get you big discounts and better trades.
Understanding Villager Professions and Their Trade Offers
Trading in Minecraft starts with one thing—villagers and their jobs. Knowing who does what, and what you can get from them, is the absolute backbone of making your trading setup work. Let’s get to know these little folks a bit better and figure out which profession does what for your adventure.
Identifying All Villager Types Eligible for Trading
There are thirteen main types of villager professions available for trading. Each has its own look (think colored aprons and hats) and is tied to a unique workstation block. Here’s a quick breakdown:
| Profession | Workstation | Can Trade? |
|---|---|---|
| Farmer | Composter | Yes |
| Fisherman | Barrel | Yes |
| Shepherd | Loom | Yes |
| Fletcher | Fletching Table | Yes |
| Librarian | Lectern | Yes |
| Cartographer | Cartography Table | Yes |
| Cleric | Brewing Stand | Yes |
| Armorer | Blast Furnace | Yes |
| Toolsmith | Smithing Table | Yes |
| Weaponsmith | Grindstone | Yes |
| Butcher | Smoker | Yes |
| Leatherworker | Cauldron | Yes |
| Mason | Stonecutter | Yes |
Each villager must have access to their workstation to keep their profession and unlock more trades. Keep in mind, villagers interact and work throughout the day, so you may not always find them at their station.
Unique Items Each Profession Provides
Every profession has its own trade list, unlocking more as you keep trading. Here’s what stands out:
- Librarians: Enchanted books (including Mending), name tags, and compasses.
- Farmers: Bread, golden carrots, and cake for easy hunger management.
- Armorers & Toolsmiths: Iron and diamond armor and tools.
- Fletchers: Tipped arrows and crossbows for archers.
- Clerics: Ender pearls, redstone, and glowstone—all good for exploring and potions.
Focusing your trades on the right villagers provides reliable access to high-quality items that may otherwise take hours—or days—to find or craft on your own.
Choosing the Right Villager for Your Needs
Selecting the best villager to trade with depends on what part of the game you’re at, and what you’re trying to get done. Here’s a list to keep things easy:
- Starting Out: Farmers are perfect—they’re easy to level and help keep your food bar filled.
- Getting Enchanted Gear: Librarians should be your main focus if you want those rare book enchants.
- Gearing Up: Armorers and toolsmiths let you skip tedious mining for diamonds and gear up quickly.
- Potions and Utility: Clerics become your go-to if you want to prep for the Nether or gather potion supplies.
Knowing which villagers to prioritize lets you build a functional economy early, instead of wandering for loot or materials.
By figuring out which profession serves your goals, you can create a trading system that works for both the early game and long adventures. Don’t forget: villagers are more than background characters—they’re your ticket to thriving in Minecraft.
Mastering the Basics of Trading Villagers
If you’ve just started exploring trading with villagers, it can feel a bit overwhelming—like stepping into a whole new side of Minecraft. Getting a handle on the basics is the first real step to building up your resources and powering up your game.
How to Initiate Trades in Minecraft
It doesn’t take much to get started with villager trading, but there are some basics you have to know:
- Find a villager with a profession (anyone except nitwits and the regular greenshirts is fair game).
- Stand close and right-click (or press the appropriate button on your platform) to open their trading window.
- Browse their trade offers, select what you want, and complete the trade.
Trades open up almost instantly, but some villagers refresh their trades only after working at their job site each day.
Trading Currency and Item Requirements
You’ll mainly use emeralds as the trading currency. Different villagers ask for common items in exchange for emeralds, or vice versa. Here’s a quick breakdown of frequently traded currencies and goods:
| Profession | Currency Needed | Example Items Wanted |
|---|---|---|
| Farmer | Emeralds, Wheat | Crops, Bread |
| Librarian | Emeralds, Paper | Enchanted Books, Books |
| Armorer | Emeralds, Coal | Armor, Shields |
| Toolsmith | Emeralds, Iron | Tools, Bells |
| Butcher | Emeralds, Raw Meat | Cooked Food, Stews |
One big plus of the trading system is the chance to get rare enchantments or top-tier armor much earlier than you’d find naturally—some events even talk about the best ways to farm emeralds fast.
Villager Experience and Trade Refreshing Explained
Trading isn’t just about getting something for yourself—the villager benefits, too. Each trade gives them experience, moving them toward their next job level. The levels are:
- Novice
- Apprentice
- Journeyman
- Expert
- Master
The journey from Novice to Master happens as you trade repeatedly. After using up all the available trades, the villager needs to work at their station to ‘restock’ their offers. This usually happens twice a day in-game, if the workstation is reachable.
If your villager runs out of trades and won’t refresh, check if their workstation is blocked, missing, or too far away—most trading hiccups start there.
Tinkering with villager trades can take time, but once you get into the habit, it becomes second nature. Before you know it, you’ll be stacking emerald blocks and gearing up for whatever survival throws your way.
Leveling Up Villagers for Superior Trades

Leveling up villagers isn’t something you can rush, but if you focus on the right steps, you’ll unlock some powerful trades before you know it. Let’s break it down so your trading workflow gets faster and more rewarding.
Villager Experience Tiers and Unlockable Offers
Villagers level up by trading with you, each new level letting them offer better items and deals. The progression looks like this:
| Villager Level | Title | Trade Unlocks |
|---|---|---|
| 1 | Novice | Basic resources, entry items |
| 2 | Apprentice | Slight upgrades, simple gear |
| 3 | Journeyman | Useful tools, unique blocks |
| 4 | Expert | Advanced armor, rare books |
| 5 | Master | Diamond gear, best enchantments |
When a villager goes up a tier, their trades reset—watch for the new items to appear in the menu. Librarians, for example, will eventually have enchanted books, while armorers unlock diamond gear.
Methods to Rapidly Level Up Trader Villagers
If you want to quickly push villagers to higher tiers, try these tricks:
- Prioritize easy trades: Early on, buy and sell items like sticks (Fletcher), paper (Librarian), or coal (Armorer), since these cost little and give good experience.
- Bulk trading: Bring a large supply of the villager’s favorite items so you can do multiple trades in one sitting.
- Refresh trades daily: Most villagers reset their offers after a workday (morning bell). Wait a bit, then check if trades are open again.
- Keep workstations handy: Make sure each villager has unblocked access to the right workstation, or their trades won’t restock, and you can’t level them further.
Tips to Avoid Trade Lockouts and Maximize Rewards
It’s easy to hit a wall with villager trading if you’re careless. To keep things moving and ensure the best deals:
- Always let villagers reach their workstation in the morning so trades restock.
- If prices go up, wait for them to restock or level up—prices usually readjust after a while or after a zombie curing.
- Trade with more than one villager type to spread out your resource needs and avoid running short of trading items.
Trading with villagers is one of the most consistent ways to get rare, enchanted equipment in survival Minecraft—so even a little patience pays off big.
If a villager stops leveling, it’s usually because they’re missing their job block or you’ve maxed out their trades for the day. Stick with the process, and soon you’ll have a lineup of master villagers offering the top gear in the game.
Building an Efficient Villager Trading Hall
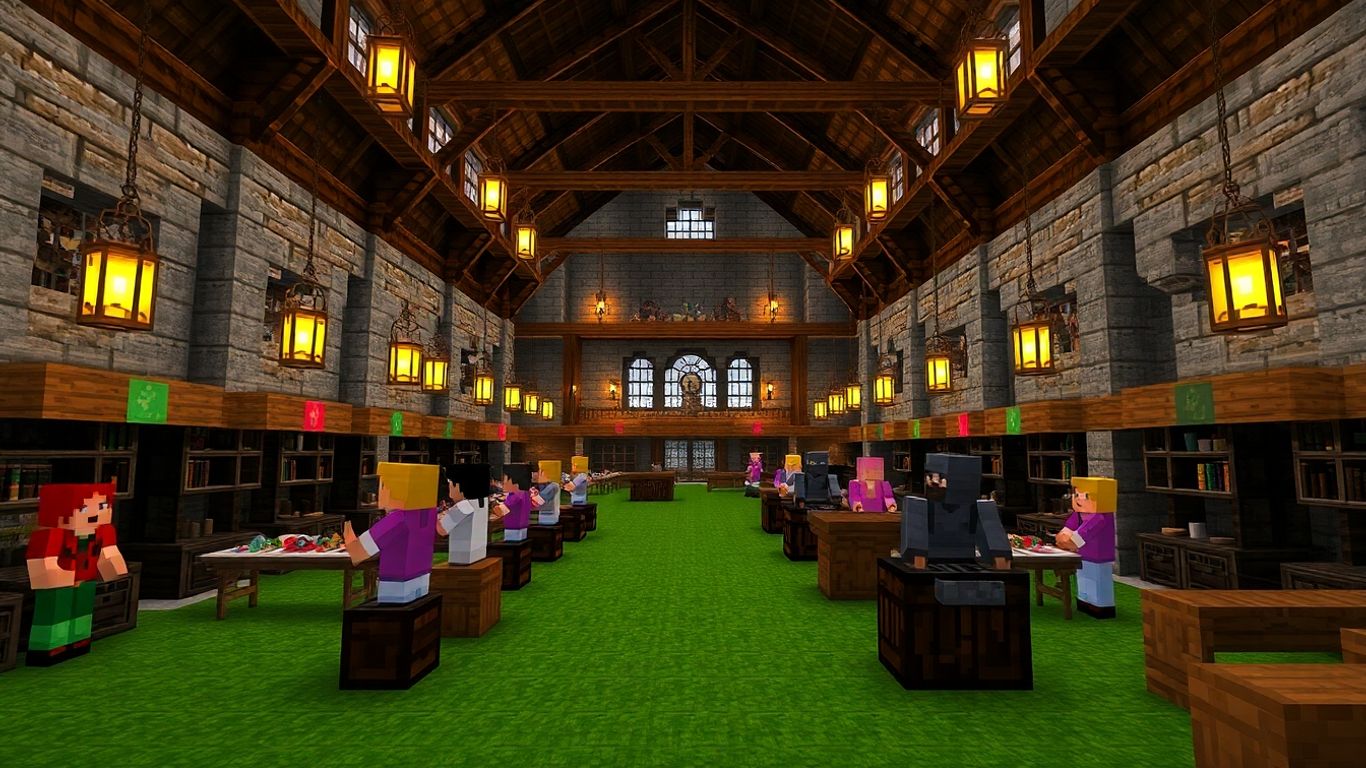
When it comes to getting the most out of Minecraft’s trading system, building a solid villager trading hall is a massive step up. It’s more than just packing a bunch of villagers in a room—if you want convenience, safety, and a steady flow of good trades, you’ve got to plan it out carefully. A well-built hall saves you time, resources, and headaches in the long run.
Designing Safe and Organized Trading Booths
To get started, you need each villager in their own booth—not just for neatness, but to protect them and to prevent mix-ups.
- Assign a single profession per booth for clarity (like librarians in one row, toolsmiths in another).
- Use fences, trapdoors, or glass to separate trading stations. This keeps villagers in place and makes them easy to access.
- Space the booths so you can walk behind or in front of the villagers without getting stuck.
- Add enough lighting (torches, lanterns) so mobs can’t spawn in the hall at night.
| Booth Feature | Why It Matters |
|---|---|
| Profession Station | Keeps trades organized |
| Barrier (Glass/Fence) | Prevents villager escape |
| Lighting | Stops mob spawns |
| Door Access | Allows quick entry/exit |
Ensuring Access to Workstations for All Villagers
Villagers need their workstations to refresh trades and keep their jobs. Place the correct workstation next to each booth:
- Librarians get lecterns
- Toolsmiths need smithing tables
- Farmers want composters
- Armorer? Put down a blast furnace
Without these, villagers can lose their profession or get stuck. Make sure the workstation is close (next to or inside the booth) so the villager uses it during their work time.
If your trades aren’t refreshing, double-check every workstation—one missing lectern can stop your entire trading line from working smoothly.
Automating Villager Transport and Placement
Moving villagers from the breeder to your trading hall is some of the most annoying busywork in Minecraft. With a little setup, you can automate almost the entire process and save hours of frustration:
- Use rails and minecarts to transport villagers safely over long distances.
- Prepare a loading dock where villagers get pushed or dropped into open booths.
- Close off each booth as soon as the villager takes their spot to stop escapes.
Extra tip: Boats also work in a pinch, especially for smaller halls. Just be ready to do some shoving.
| Automation Tool | When to Use |
|---|---|
| Minecart/Rails | Long distances, many villagers |
| Boats | Short trips inside buildings |
| Trapdoors/Fences | Locking villagers into place |
Building a great trading hall isn’t just about keeping villagers lined up—it’s about making your trading routine nearly effortless. It may take some trial and error at first, but once you get the hang of it, you’ll wonder why you didn’t set one up sooner.
Breeding and Expanding Your Villager Workforce
Growing your village is one of the smartest ways to keep a steady flow of good trades rolling in. If you’ve ever noticed your trading hall getting a little too quiet or empty, it might be time to set up the right conditions for breeding new villagers. Let’s run through how to breed, assign jobs, and keep the whole operation running smoothly.
Setting Up Conditions for Successful Breeding
If you want baby villagers running around, you can’t just rely on luck. These are the basics:
- House at least two villagers together in a safe, closed area.
- Make sure there are enough beds placed—one for each villager plus at least one extra.
- Supply plenty of food. Villagers prefer bread, carrots, or potatoes.
- Be patient! Once they’ve got their needs met, you’ll see hearts above their heads and, soon after, a baby villager appears.
| Requirement | Details |
|---|---|
| Number of Villagers | 2 (minimum) |
| Beds | At least villager count + 1 |
| Food per Villager | 3 bread or 12 carrots/potatoes |
If you want a more step-by-step look, you can check out an easy way to breed villagers for more detail.
Creating the right breeding environment isn’t hard, but it does take a bit of prep work up front. Once it’s set up, you’ll have a steady supply of new villagers in no time—just make sure they’re safe from mobs while growing up.
Assigning Professions for Maximum Trade Versatility
When a baby villager grows up, it’ll look for an available workstation and grab a profession based on the station it finds first. Here’s how to maximize your trade variety:
- Place the workstation for the profession you want right next to the new adult villager.
- Limit each workstation to one villager so they don’t snatch each other’s jobs.
- Use this control to fill gaps in your trading hall—need more librarians for enchanted books or a new armorer for gear? Set out the corresponding blocks (like a lectern or blast furnace) as they grow up.
Giving each new villager a unique workstation lets you control what kind of trades will be available to you later. It might take a few tries to get the perfect lineup, but you’ll thank yourself when you want to scale up trading.
Managing Bed and Food Resources in Your Village
Breeding grinds to a halt without enough beds and food available. To keep the cycle going:
- Make sure every villager (and every new baby) has a bed to claim.
- Keep their food stocks topped off by periodically tossing bread or veggies near them.
- Expand your farm as your population grows—bigger villages need more food!
| Item | How Much Per Villager Is Needed? |
|---|---|
| Bread | 3 loaves |
| Carrots | 12 |
| Potatoes | 12 |
Making sure you’ve got enough beds and food will save you from stalled growth, and you’ll avoid the disappointment of villagers refusing to breed. Keeping everyone fed and rested? Turns out, it’s the secret to a thriving trading empire.
Remember, breeding isn’t just about numbers—it’s about setting up the trades you want and making sure every new villager has a clear role and a safe place to work.
Advanced Trading Villagers Techniques for Better Deals
Villager trading might seem straightforward, but there are some next-level tricks you can use to stretch your emeralds and stockpile better loot. By going beyond the basics, you can save time and gather gear you’d never get just by mining. Let’s get into the techniques that pay off the most.
Curing Zombie Villagers for Discounted Trades
Turning a zombie villager back into a regular villager is more than a science experiment—it unlocks some of the best prices in Minecraft. Cured villagers remember your goodwill and will offer much lower prices on their trades, sometimes reducing the emerald requirement by over half.
Steps to Cure a Zombie Villager:
- Trap the zombie villager somewhere safe.
- Throw a Splash Potion of Weakness at them.
- Feed them a golden apple.
- Wait a few minutes for the transformation.
Here’s a table showing how big the discount can be:
| Number of Cures | Discount on Trade | Example: Book Price |
|---|---|---|
| 0 | None | 20 emeralds |
| 1 | Up to 60% | 8 emeralds |
| 2+ | Up to 90% | 1-2 emeralds |
Curing zombie villagers can seriously lower the cost of rare items, like enchanted books. Once you see those prices drop, you’ll want to make curing part of your trading setup every time.
Rerolling Trades Using Workstations
Sometimes, you get a villager with trades you don’t need. Before you use them, take their workstation away and place it back down. They’ll switch up their trades, and you can keep repeating this until you see something you want (just make sure you haven’t traded with them yet!).
- Pick up and replace the villager’s workstation (like a lectern for librarians)
- Check new trades after each time you replace it
- Once you find a good trade (like Mending or Unbreaking III for a librarian), lock it in by trading at least once
It really comes down to patience—you might spend some time doing this, but when you end up with the perfect trade, it’s worth every second.
Creating a Trading Loop for Unlimited Resources
If you’ve got a base set up with a few trading booths, you can basically run a loop where your emeralds turn into gear and rare items, then you trade other farmed items back into emeralds to keep the loop running. Here’s how:
- Trade bulk farmed goods (like sticks, crops, or paper) for emeralds with farmers, fletchers, or librarians
- Use emeralds to buy gear, enchanted books, or tools
- Repeat daily as trades refresh
Some popular trading loops:
- Wheat, potatoes, beets (farm → farmer → emeralds)
- Sticks from tree farms (sticks → fletcher → emeralds)
- Paper from sugarcane (paper → librarian → emeralds)
Setting up a trading loop means you’ll never run out of key supplies, and you can keep upgrading your gear without ever leaving your base.
Troubleshooting Common Villager Trading Problems
Trading with villagers in Minecraft mostly goes smoothly, but sometimes things just don’t work as planned.
Resolving Issues with Unavailable Trades
Villagers might suddenly stop trading or not offer any trades at all. Here’s what to check first:
- Make sure the villager has access to their profession block (like a lectern for librarians).
- Confirm the villager is not already locked in a trade cycle (the badge above their head can indicate this).
- Sometimes, villagers need their workstations to refresh trades. Check if it’s day time and the workstation isn’t blocked.
If all else fails, breaking and replacing the workstation can fix the issue.
| Problem | Quick Fix |
|---|---|
| No trades available | Give access to workstation, wait for day |
| Stuck trade offers | Try a different workstation, restart trade |
| Villager won’t respond | Move closer or remove obstructions |
When villagers refuse to trade, check their workstation first. Often, it’s just a simple fix away and doesn’t require resorting to drastic changes in your setup.
Helping Villagers Level Up When Stuck
Leveling villagers is usually easy, but sometimes their experience progress stalls. Try these steps:
- Trade all available offerings to fill the XP bar.
- Wait for their trades to refresh—this often happens at least twice a day in Minecraft time.
- Ensure no other villager is linked to their workstation, which can accidentally cause issues.
You can also:
- Increase your emerald supply to buy out more trades at once.
- Use the ‘reroll’ trick: pick up and place the workstation (if the villager hasn’t been locked to a career).
- Ensure there are no mobs nearby; fear can sometimes freeze villagers.
Protecting Villagers from Zombie Attacks and Accidents
Losing a villager to a zombie is frustrating. To prevent this:
- Build walls, doors, and fences around your trading area.
- Use plenty of torches or lanterns to keep things lit—zombies spawn in the dark.
- Consider using iron doors opened by buttons to keep mobs (and villagers) exactly where you want them.
- Keep beds and workstations inside a sealed, well-lit building.
- Make routine patrols around your base at night, especially after you hear zombie sounds.
You’ll save yourself a lot of trouble if you set up strong defenses from the start. Once a villager is gone, reviving your trading network becomes way more work than simple prevention.
Keeping Up with Minecraft Updates and Future Trading Changes
The Minecraft world never stays the same for long—a new update can change how you trade with villagers overnight. If you’re all in on trading, you need to watch for tweaks, and sometimes, totally new ways to strike deals with your villagers.
New Professions and Trade Options to Expect
It feels like every year brings new jobs for villagers. Think about how Toolsmith and Fletcher became must-have traders once they showed up. More jobs could show up soon, bringing items we can’t get anywhere else or new versions of favorite trades.
These might include:
- Brand-new enchanting books tied to brand-new professions
- Rare materials or blocks found only through specific villagers
- Updated wandering trader inventory
| Profession | Possible New Trades | Current Availability |
|---|---|---|
| Lumberjack | Unique wood types, saplings | Possible future update |
| Alchemist | Advanced potions | Not available yet |
| Explorer | Maps, rare biome items | Not available yet |
Adapting to Tweaks in the Villager Trading System
Nothing is ever set in stone—not even in Minecraft. Mojang sometimes changes how many trades a villager offers, how quickly they restock, or the prices for certain good deals. If you keep trading the same items, you might suddenly hit higher prices or different availability after a patch.
What to do?
- Always test your regular trades after an update drops
- Check the in-game news feed or official Mojang channels for known issues
- Save a backup of your world before big updates
It’s not fun to find out your trading hall design needs a makeover because villagers won’t path to their stations like they did yesterday.
Staying Ahead with Patch Notes and Community Tips
Honestly, half the battle is just knowing what’s coming. Here’s how to avoid getting caught off guard:
- Read patch notes right after an update goes live (or before, if they’re posted early)
- Follow a few Minecraft news sites or lively YouTubers who break down the nitty-gritty
- Join a community—Discord, Reddit, wherever—and just ask around when you’re not sure
There’s not much worse in Minecraft than building a huge trading setup, only to find out the mechanics changed. A quick five-minute read through community tips has saved my builds more times than I can count.
Sooner or later, you’ll have to tweak your setup, but watching for small changes saves you hours (and a few headaches). When the next big profession or trade lands, you’ll be ready to take full advantage, not scrambling to catch up.
Conclusion
So, that’s pretty much everything you need to know about trading with villagers in Minecraft these days. It might seem a bit overwhelming at first—there are a lot of professions, a bunch of different trades, and sometimes villagers just don’t cooperate. But once you get the hang of it, trading becomes one of the easiest ways to get rare items, enchanted gear, and all sorts of resources without endless mining or wandering. Just remember to keep your villagers safe, set up a good trading hall, and don’t be afraid to experiment with different setups. Minecraft keeps changing, so new trades and professions might pop up in future updates. Stay curious, keep an eye out for new features, and have fun building your own little trading empire. Happy crafting and good luck with your next big trade!
Frequently Asked Questions
How do I start trading with villagers in Minecraft?
To trade with a villager, walk up to them and right-click (or use the trade button for your device). The trade menu will appear, showing what items you need and what the villager offers. You’ll need emeralds and sometimes other items to make trades.
Why won’t my villager refresh their trades?
If your villager isn’t refreshing trades, it might not have access to its workstation. Make sure the right workstation is close by and that the villager can reach it. Also, villagers only refresh trades during the day, so try trading when it’s light outside.
How can I get better trades from villagers?
Villagers unlock better trades as they level up. You can level them up by trading with them often. Each time you make a trade, the villager earns experience, and new, better trades will become available as they reach higher levels.
What’s the best way to protect my villagers from zombies?
Build strong walls or fences around your village, add lots of light with torches or lanterns, and use iron doors or glass panes to block zombies. You can also build Iron Golems to help keep villagers safe from attacks.
How do I cure a zombie villager for cheaper trades?
To cure a zombie villager, throw a potion of Weakness at them and feed them a golden apple. After a few minutes, they’ll turn back into a regular villager and offer you big discounts on trades as a thank you.
Can I change a villager’s profession to get different trades?
Yes, if a villager hasn’t been traded with yet, you can break their workstation and place a new one to change their job. For example, placing a lectern will make them a librarian. This lets you pick the trades you want most.